Monday, November 30, 2015

Pantry In Action: Black Bean Power Breakfast

The "Pantry in Action" series shows creative ways of using all the wonderful food we've preserved during the year. I will include recipes wherever appropriate with links back to the post(s) where a particular ingredient (or ingredients) was canned.

Okay, putting this post under "Pantry in Action" is a bit of a stretch for me and my pantry at the moment, but it should (and would if I had all my pantry staples made) be able to make use of many pantry staples, like canned black beans, dried tomatoes, frozen chopped spinach and canned beef stock. At the moment, all I have available in my pantry for this recipe are the dried tomatoes. So, for this post, we will have to substitute commercial products for the rest. Oh well, even if they are not strictly "locavore", they are products of Ontario or at the very least, products of Canada.


Anyway, the inspiration for this recipe springs from an attempt I made a couple of years ago to change my diet and try to lose some weight.  If you've been following this blog, you've no doubt come to the conclusion that I like to surf the web and it's true: I do like exploring cyberspace, especially if I'm on a mission.

So, in my electronic travels, I happened across Tim Ferris and his 4 Hour Body.  Basically he would have you eat high protein, low carb meals 6 days a week and then a deliberate "cheat" on day seven where you load up on all sorts of yummy hi-caloric treats to spike your metabolic rate.  He suggests limiting the number of different high protein, low carb dishes during the 6 days and just rotating through the same 3 or 4, preparing an inventory of them in advance so you don't need to think about what to have for your next meal and will therefore be less likely to cheat until the designated "cheat" day.

I tried it for several months a few years ago, and it actually worked -- I lost about 15 pounds -- but I got tired of eating the same few dishes over and over again so I slipped off it.  I am contemplating trying it again after the holidays are over and see if I can't lose some weight again.  Another 15 pounds would be nice. Twenty would be even better!  This time, though, I will add more dishes to the repertoire to keep interest up.

Another of Tim's rules is to always eat (a high protein) breakfast within 1 hour (and preferably within 30 minutes) of waking up in the morning.  I started doing just that when I first went on the 4 Hour Body plan and I've been doing it ever since. Amazing to think that not so many years ago, my stomach would revolt at the thought of eating anything until I had had at least two big cups of coffee in the morning!  Change is possible!

One of Tim's power breakfasts consists of cooked lentils, sautéed spinach and a poached egg. This recipe is a re-construction of that to allow me to make it in advance and freeze individual portions, so in the morning, I can simply pop one into the microwave to defrost and re-heat while I am in the shower. If you're fussy about your eggs, this may not be for you because scrambled eggs become very rubbery when defrosted.  I've switched to using a carton of yolk-replaced eggs and the texture after defrosting is a bit better, but nowhere near that of freshly cooked. So, take note. I tolerate the chewiness for sake of convenience in the morning when I'm rushing to get out the door.

So, I start by draining and rinsing 2 cans of black beans. 


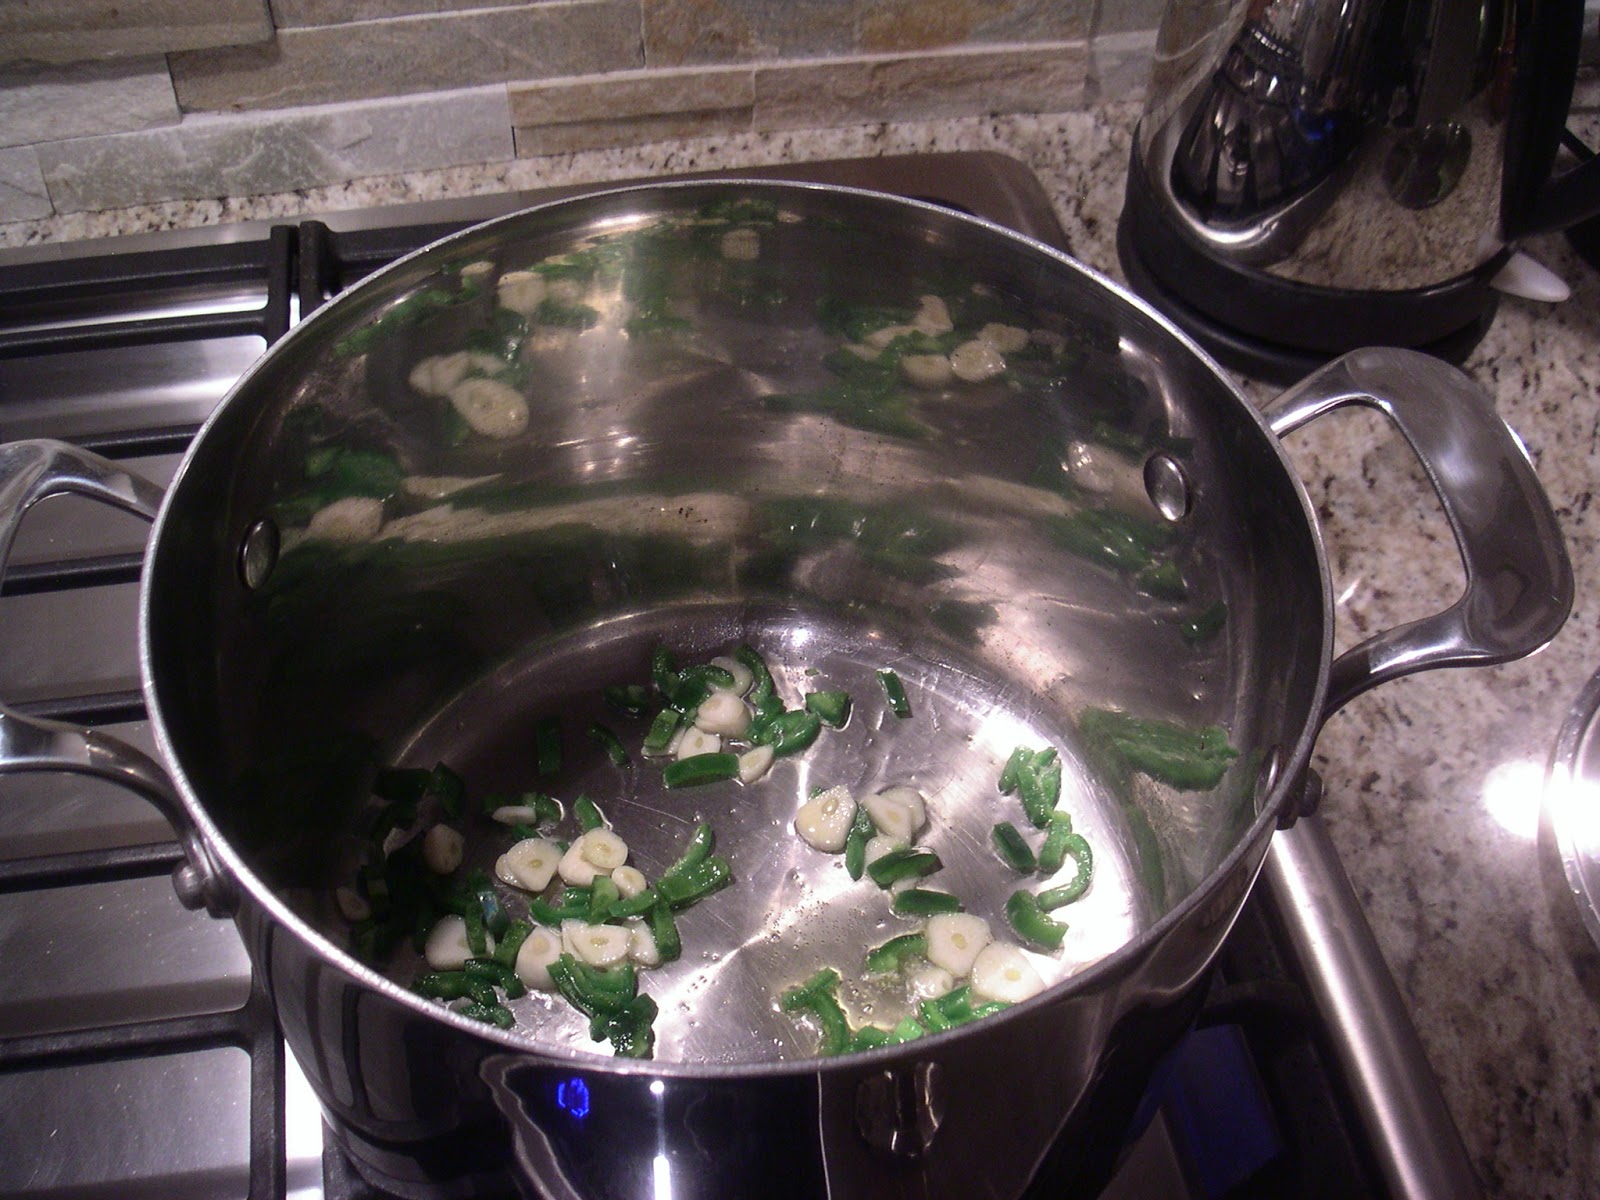
Next, I peel and slice a couple of garlic cloves and a handful of sliced home-dried tomatoes.


Sauté until fragrant and then ...


... add the drained black beans. Continue to cook on medium-high heat until the beans are heated through and start to pop, about 5 minutes.


Add a can of beef stock and bring to boil.


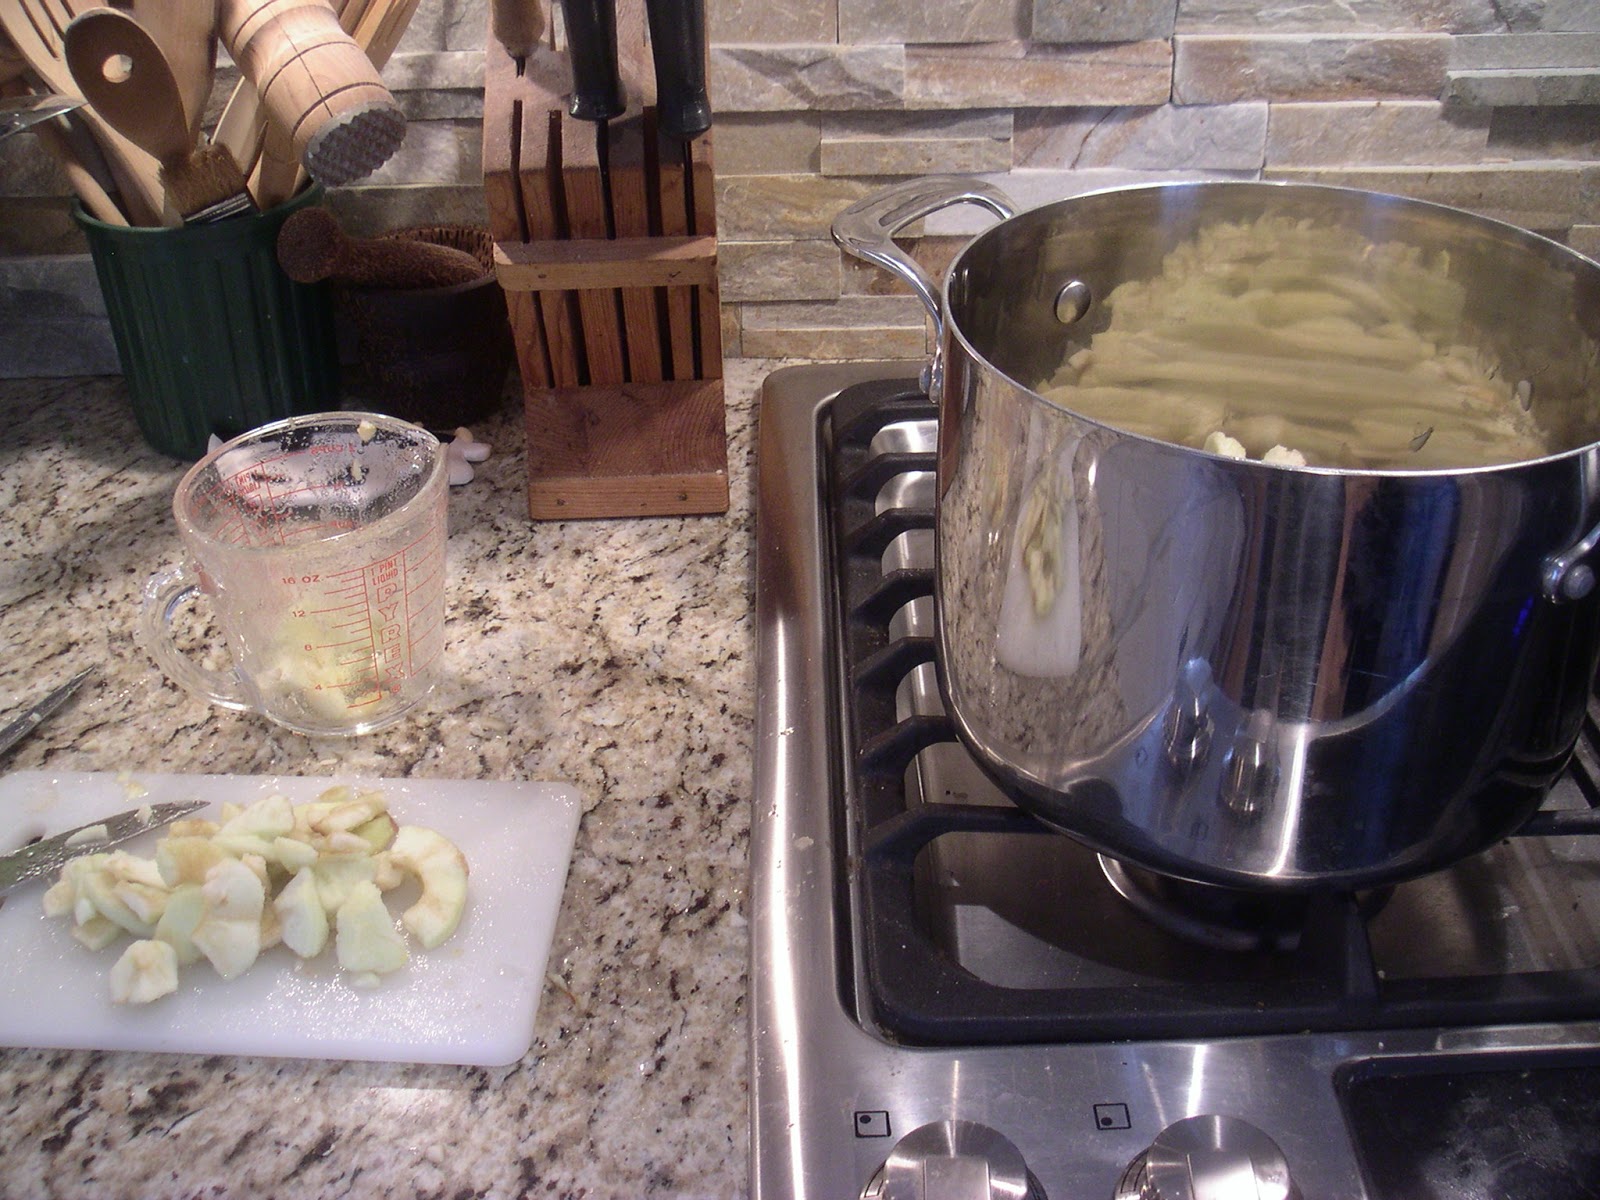
Add some frozen chopped spinach.  The spinach pictured above is from Sobey's and I think it's just a brilliant way of packing -- so much handier than those frozen bricks we usually see.  If I decide to grow spinach next spring, I think I may try freezing some of it this way in ice-cube trays.

I cover the pan at this point to help the spinach thaw and melt into the beans and leave it sit for 5-10 minutes before uncovering it and giving it a good stir.


Most of the liquid should have been absorbed by the beans and the spinach should be completely thawed.


Divide equally among 6 two-cup freezer containers.


Either beat 6 large eggs until thick and lemon-coloured and pour into the bean pan or use a carton of yolk-replaced eggs.


Cook eggs until well-scrambled then divide evenly among the freezer containers.  Let cool, then cover and freeze.

Wednesday, November 25, 2015

Pantry in Action: Weeknight Curry

The "Pantry in Action" series shows creative ways of using all the wonderful food we've preserved during the year.  I will include recipes wherever appropriate with links back to the post(s) where a particular ingredient (or ingredients) was canned.

This is a variation on my beans, greens and grains bowl from a couple of posts back and utilizes a couple of my pantry staples: canned diced tomatoes and tomato paste.  You can find the recipe here.


Every once in a while, I will get a craving for curry and since it's been a while since I last had some, I started thinking about tweaks I could make to my beans, greens and grains bowl to create a curry that was fairly easy to whip up on a weeknight after a long day at work.


So, I'm following a similar method but changing up the ingredients to include:

  • onions, garlic, celery and carrots as my aromatics 
  • a white potato and 6 sliced white mushrooms for added body
  • 1 can of chickpeas and 1 can of navy beans because that's what was in the cupboard
  • curly kale as my greens
  • quinoa as my grain (yes, rice would be more authentic, but I used that last time)
  • something vaguely "Indian-esque" for the seasonings (including curry, of course!)
I started as before by rinsing the beans and leaving them to drip drain in a colander while I prepped the vegetables.  I peeled a few cloves of garlic and peeled and quartered a medium white onion then blitzed them together in the food processor until they were roughly chopped.  I diced 3 medium carrots, 3 ribs of celery and the unpeeled potato into about ½-inch pieces and cut out the center rib from each of the kale leaves and chopped them into ½-inch pieces as well.


Since quinoa cooks much quicker than brown rice, I left it until now to start it.  Using my usual ratio of 2 parts liquid to 1 part grain, I started 1½ cups of white quinoa cooking in 3 cups of vegetable stock.


Like cooking rice, I let it come to a full boil, then moved it onto the smallest hob turned down to the lowest setting, covered the pot and left it undisturbed while I completed the curry.

I started making the curry by first cooking up a seasoning paste.  I sautéed the chopped onion and garlic in a little olive oil until translucent and then added a 125ml jar of my home canned tomato paste.


If you've never canned homemade tomato paste, I urge you to try it -- the results are so worth it!  Like applesauce, once you try homemade, you'll never go back to store-bought again.

So, I added the tomato paste and stirred it around with the onions and garlic for while until it was starting to caramelize a little and smelling heavenly.  Then (totally guesstimating), I added 2 tblsp. basic grocery store curry powder, 1 tsp. ground cumin, 1 tsp. ground coriander, and ¼ tsp. cayenne pepper and kept stirring until the spices were toasted and the whole thing turned into a stiff paste. After a quick taste-test, I decided it needed some salt and black pepper so I added a generous pinch of both and stirred them in.


Next, I added a jar of my canned diced tomatoes, mixed it well and brought it to a fast simmer before adding the chopped vegetables, stirring thoroughly and leaving it to simmer covered for about 10 minutes.

A quick check on the quinoa showed it was coming along nicely, but still had some liquid left to absorb, so I put the lid back on the pot and left it again while I tore the kale leaves into bite-sized pieces (not having the patience after a long day to chiffonade them).


That done, I added the beans to the vegetables along with a can of regular (not light) coconut milk, turned up the heat and brought it to a boil, then turned the heat back down to medium again, covered the pot and let it simmer for about another 10 minutes.


After 10 minutes or so, I piled the torn kale leaves in on top of the curry.  It pretty much filled up the pot, but the leaves really do cook down, so I turned the heat back up to bring it to boil, covering the pot, and leaving it to steam the leaves for about 5 minutes or so or until they turned bright green.

Once done, I stirred the steamed leaves down into the curry to finish cooking, turned the heat back down to medium again and let it simmer, covered for another 5 or 10 minutes.  While that was happening, I took the quinoa off the heat and fluffed it with a fork before serving it up topped with a couple of ladles of the finished curry.  A squeeze of fresh lime juice and a sprinkle of fresh chopped cilantro would be lovely, but I had neither this evening, so I did without.

It's very tasty, easy and quick enough to do on a weeknight and like any good curry, it doesn't assault your tastebuds, but builds up slowly with each mouthful.  The homemade tomato paste shines in this recipe and it, along with the coconut milk serve to mellow and smooth out the "curriness".

This might work well with the addition of chicken or shrimp, though I think if I went that route, I'd be tempted to add another can of coconut milk and maybe a cup or two of water or stock to increase the amount of sauce.

Monday, November 23, 2015

Pantry in Action: Yucatan-style Chicken, Lime and Orzo Soup

The "Pantry in Action" series shows creative ways of using all the wonderful food we've preserved during the year.  I will include recipes wherever appropriate with links back to the post(s) where a particular ingredient (or ingredients) was canned.

This is another great soup that I make often.  


The original recipe can be found here on Epicurious.com, but I tweaked it slightly (of course!) to use a jar of my canned diced tomatoes instead of the chopped fresh tomato and I used my own canned chicken stock. Other than that, though, I followed the original recipe pretty faithfully.


This is another soup that freezes rather well, although the orzo does tend to absorb more of the stock if it is frozen, thawed and re-heated, causing the soup to thicken up a little, but I find that makes it all the more satisfying and rib-sticking on a cold winter's day. I will make a batch of this on the weekend every few weeks or so and portion it out into 2-cup freezer containers ready to grab on my way out the door on weekday mornings. Another great lunchtime standard.

Wednesday, November 18, 2015

Beans, greens and grains: The ultimate comfort food?

This isn't a recipe so much as a general methodology for getting more fibre, leafy green vegetables and whole grains into your diet (something that my diet can certainly use!).  The shorter days and colder nights of fall and winter conspire to make me crave comfort foods which is fine and generally nutritious and all, but they tend to be heavy on the carbs and a bit lacking in fibre and greens.

I recently watched an episode of The Nature of Things on CBC concerning the importance of fibre to our diets, specifically the microbes in our gut.  Fascinating and very informative.  You can watch it here.  It certainly made me rethink things and decide to get serious about it.

The thing about comfort foods is they're usually pretty easy to prepare and you know and love exactly what you're getting: something yummy and satisfying to eat.  So, in order to incorporate more fibre, more leafy green vegetables and more whole grains into my diet and make it a habit, I need to create new comfort foods out of them.


Beans and legumes are a terrific source of fibre and I do eat them fairly regularly already, but usually for lunch only.  I wanted to start incorporating them more into dinners as well.  Leafy greens are more a part of my diet in the summer when I tend to eat more salads and in the fall and winter my consumption of them tends to drop dramatically.  So, I wanted to bring that back up, too.  I'm not too bad with the whole grains, but more at breakfast and lunch than at dinnertime, so incorporating them more into dinners would be good thing.

So, what to do?  Well, within weeks of each other I came across two different books that have inspired me.  The first one is small and paper-bound -- almost a booklet -- called Kill the Recipe (love that title!) by Mark Andrew Gravel, a Brooklyn-based cook.  It's all about cooking with beans and to quote the book:

"The book shows you, through a series of how-to's, all the ways you can repurpose a simple pot of beans into other convenient and inexpensive meals throughout the week. It guides you through making a heady soup or stew, an earthy casserole, a velvety puree, a quick saute or a flavorful side, a cool salad, easy bean patties and crunchy roasted beans."

You can actually read the entire book online through the above link and/or show your gratitude to Mark and purchase the book from there or from Amazon (which is where I stumbled across it while looking for other cookbooks).  Me, I like having an actual paper book I can hold in my hands, flip through and write notes in.  There's just something about the tactility of it all!

I found the second book, Whole Grains for a New Generation, via a link on Marisa's Food In Jars blog to a post she put up on the Table Matters blog.  It's a veritable treasure trove of information on many different types of whole grains and how to prepare them as well as being a great cookbook.

What I love most about this is that it is totally freeform -- you can make whatever strikes your fancy by following a few guidelines.  Using Kill the Recipe as a reference, in my methodology ingredients are divided into five groups:  the "aromatics" (onions, garlic, fennel, celery, ginger, carrots etc.), the "beans" (dried or canned black, navy, kidney, romano, chickpeas etc.), the "greens" (kale, chard, spinach, bok choy etc.), the "seasonings" (salt, pepper, any number of spices) and the "grains" (rice, barley, quinoa, freekeh, millet, etc.).  Pick as many as you like from each of the five groups.  Prepare the beans (soaking and draining, rinsing etc.), sauté the aromatics in some olive oil until tender-crisp then add the beans and their cooking liquid as well as the seasonings and simmer until the beans are cooked. Sauté or steam the greens and add to the beans or keep separate. Meanwhile, prepare your chosen grain(s), pile in large serving bowls and top with the bean mixture and the greens. Dig in!

This is very similar to what Isa Chandra Moskowitz calls a "Hoppin' John" bowl on her website, the Post Punk Kitchen.  I love the idea of topping the bowl with tahini and hot sauce and the diced tomato and parsley salad!

You can find an outline of my "methodology" here.

For this post, I am going to use:

  • onions, garlic, fennel, celery and carrots as my aromatics
  • canned mixed beans as my beans
  • red swiss chard as my greens
  • brown long-grain rice as my grain
  • something vaguely "Italian-ish" for the seasonings
See how loosey-goosey it can be?  So, let's pop on a cool jazz playlist, pour a glass of wine and get cookin'!


I'm starting with cooking the brown rice as it takes a while.  I used about 1½ cups of rice, 1 cup of beef stock and 2 cups of water, keeping to my tried-and-true ratio of 2 parts liquid to 1 part rice.  I brought it to a full rolling boil, then I turned the heat down to the lowest setting (actually, I moved the pot over to my smallest hob and turned it on to the lowest setting), covered the pot and let it sit undisturbed while I prepared the rest of the ingredients.

Next, I opened the 2 cans of beans, drained them in a colander, rinsed them well in cool water and let them drip drain while I continued on.


I chopped all my "aromatics" -- the carrots, onions, garlic, celery and (new for me) fennel into smallish (½-inch) pieces.  I've eaten fennel in dishes before, but I've never actually cooked with it.  I quite like it!


I coated the bottom of a large soup pot with olive oil, added all the chopped "aromatics" along with some sliced mushrooms and gently sautéed them until the onions were translucent and the whole thing smelled wonderful!  I then added a 750ml jar of my diced tomatoes, juice and all, along with the rinsed and drained beans and brought it up to a boil before turning down the heat to about medium, covering the pot and letting it simmer until the carrots and mushrooms were tender, about 15 minutes or so.  See, nothing is definite or specific about this (not a) recipe -- you just play around with it, constantly checking and doing taste tests and just generally having fun!


So, while the vegetables were simmering and after a quick peek at the rice, I prepared another new-to-me vegetable:  Swiss Chard. When I was at Loblaws earlier in the week, they had both the green and the red chards and in the true spirit of experimentation, I went for the red. Having now had Swiss Chard, I can't wait to find some Rainbow Swiss Chard -- the colours are amazing!  Hmmm... maybe next year I'll get some seed and grow some!  I must admit, part of the fun of all this is having an excuse to be adventurous (not that any of us should need an excuse!) and try new foods.


Since the center vein of the chard leaf is so large and pronounced, it's really easy to cut it out by running the tip of a sharp knife down each side of the vein.  I set the leaves aside for a moment while I chopped the veins into small pieces, rather like celery, and added them to the pot of simmering vegetables. I then left it to simmer away on low heat until the beans were tender and everything was heated through, about 15 minutes or so.


Meanwhile, I rolled up each chard leaf width-wise into a cigar shape and then cut cross-wise into thin ribbons (chiffonade).  I then added the chiffonaded leaves to the pot of vegetables along with my seasonings: oregano, basil, parsley, fennel seed, winter savoury, a couple of bay leaves and a bit of sea salt and freshly ground black pepper.  Again, no measuring -- I just went by sight, smell and taste until I was happy with it.  Covering the pot, I let it simmer another 5 minutes or so to wilt the chard leaves then gave it all a good stir before dishing everything up.


Although I was happy with my tastings along the way, nothing really rocked my boat.  Everything tasted fine, but it was all sort of "meh". BUT! When I put it all together and drizzled some tahini with hot sauce over it (I mixed about a cup of tahini with about 1 tblsp of Frank's Red Hot and used about half of that on the bowl), what can I say but WOW!  This is one of those dishes whose whole is way more than the sum of its parts.  I pretty much inhaled the bowl you see above while watching the news on TV last night.  Hearty, tasty, filling and oh-so-satisfying.  Not to mention healthy and nutritious. I think I've found the ultimate comfort food!

UPDATE:  November 19, 2015 -- I had some more of this for dinner again last night and like a good chili or stew it was even better as leftovers!  There is still a bit left and I am going to try freezing it to see how it reheats after thawing.  Will let you know in a future update.

UPDATE:  November 24, 2015 -- I thawed and re-heated the leftovers in the microwave and they were every bit as good as first made!  This recipe/methodology/whatever-you-want-to-call-it is definitely a keeper!

Sunday, November 15, 2015

Putting the garden to bed

It was such a beautiful autumn day today, that I was thankful I had finished up the canning yesterday while it was cold and blustery so I could spend today out in the fresh air raking leaves and cleaning up the garden beds in readiness for winter.


I like to rake the leaves off the lawn and onto the garden beds to protect the perennials and as I have no trees in my yard apart from a single Bing Cherry, I don't have a lot of leaves of my own to rake. Most blow in from my neighbours' trees and as I have gradually been adding to my perennials over the last number of years, I am now at the point where I could actually use more leaves.  I'm probably okay for this year -- the trees aren't completely bare yet so there will be more leaves to rake in another week or so -- but it's something to think about for next year.


Pulling up all the dead zinnias, cutting back the dead peony stems and trimming back the dead hosta leaves makes the yard and garden look nice and tidy.  I could have stayed out all day, but by mid-afternoon I had had enough and it was still so warm in the sun that the deck was calling me to sit and enjoy a glass of wine.  So that's what I did!  Besides, next weekend is supposed be nice and sunny (although much cooler) so I will continue my clean-up efforts then.

Saturday, November 14, 2015

2015 Pantry inventory

Now that I've canned everything that truly needs to be canned at the moment, I thought this would be the perfect time to take stock. Literally. As in taking an inventory of my pantry.  This includes jars that I put up earlier in the year before I began this blog.  So, here is my 2015 pantry inventory to-date:


  • Tomato Purée -- 2 pints
  • Pizza Sauce -- 8 half-pints
  • Pasta Sauce -- 7 pints
  • Diced Tomatoes -- 17 pint-and-half jars
  • Tomato Paste -- 9 quarter-pints
  • Tomato Jam -- 2 pints + 12 half-pints
  • Green Tomato Chutney -- 8 half-pints
  • Diced Peaches -- 5 pints
  • Diced Peaches with Blueberries -- 3 pints
  • Blueberries -- 4 half-pints
  • Strawberries -- 12 half-pints
  • Strawberries with Rhubarb -- 6 half-pints
  • Peach Salsa -- 1 pint + 6 half-pints
  • Apple sauce -- 18 pints
  • Mincemeat -- 5 quarts

Left over from 2014:

  • Bread and Butter Pickles -- 1 quart + 4 pints + 1 half-pint


The end of the apples: mincemeat and even more applesauce!

Although apples do store rather well, they won't last forever and I desperately needed to use up the rest of the freebies I received from my friends Fred and Michael a few weeks ago.  We've had it unseasonably warm here for the last little while and although it's been lovely up until the past couple of days, it hasn't been great for keeping apples crisp and fresh, even out in shed.

So as a number of them were already rotten and a number more were on the edge, I figured I'd better snap to it and use them up pronto.  And today was just the day to do it!  Cloudy and blustery and totally conducive to canning in my cozy kitchen.

While searching for apple-y things to make other than applesauce, I came across this recipe for mincemeat on the Bernardin website.  Like fruitcake, mincemeat was a Christmas staple for me growing up.  There`s nothing quite like a mince tart with a glass of sherry on a snowy afternoon to put you in the holiday spirit!

When I was a child, my mother used to buy Crosse & Blackwell mincemeat and, for me, that was the definitive taste -- true, authentic British mincemeat.  And for many years as an adult, I, too, sought out Crosse & Blackwell for nothing else would do. However, for reasons unknown to me, for the last few years my beloved mincemeat has been impossible to find.  I must admit, President`s Choice from Loblaws does make a very respectable substitute that I have used when I can`t find Crosse & Blackwell.

However, when one has many apples to put up and what looks like a killer mincemeat recipe that will use up a fair number of said apples, well, it`s pretty much a no-brainer, right?  Besides, it gave me the perfect excuse to acquire a new toy tool:


This, my friends is an apple peeler/slicer/corer and if you have a lot of apples to prep, it's well worth getting one, IMHO.  I got mine at Lee Valley, the toy store for us gadget geeks!


Peeled, cored and sliced in 10 seconds flat!  Awesome!  


After that, chopping the apples was a breeze!  The recipe also calls for 2 "ground" oranges and 2 "ground" lemons.  Not being entirely sure what that meant, I decided to try chopping and seeding washed whole, unpeeled, organically grown oranges and lemons and then processing them in the food processor into a rough slurry. Since I was using the fruit unpeeled, I went with organic.  Why ingest chemical sprays?


I ended up with about a cup-and-a-half each of the orange and lemon slurries, which I then added to the rest of the fruit in the pot.


After adding the sugar and spices and giving it a good stir, it needed to simmer for about 90 minutes which gave me plenty of time to process the remaining apples for apple sauce.


On both the previous batches of apple sauce I made, I had apples burn to the bottom of the pot despite having added water, so I thought I would try something different this time and bake the apples instead of boiling them.  All we need to do is soften the flesh, right?  So why should it matter which way we do it?


So, I got out my biggest roasting pan, a cutting board and the compost pail and went to work!  Like before, I didn't bother peeling or coring -- just trimmed off any blemishes and cut the apples into quarters.


I poured a pint bottle of sparkling apple cider and about 2 cups of water over the apple segments, popped on the lid of the roasting pan, and slid it into a 375F oven to bake for 45 minutes.


Meanwhile, the mincemeat was coming along nicely and the whole kitchen was starting to smell like Christmas.  With 30 minutes of simmering time left, I got the water bath and jars ready.


Once I had the jars of mincemeat filled and in the canner, I had time and counter space to set up my beloved tomato mill ready to process the baked apples when they came out of the oven.


As before, the tomato mill did a terrific job of saucing the apples and this time there was nothing burnt to the bottom of the pan.  Cleanup was a breeze!


The result:  Five quarts of mincemeat and 6 pints of apple sauce.   As before, the apple sauce is delicious and I really like the mincemeat, too.  It's a bit more citrus-y and tangy at the moment than the Crosse & Blackwell or the President's Choice brands, but it will keep for quite a while so I am hoping that over time it will mellow out somewhat and let the sherry, brandy and spices come through a bit more.

As a bonus, I ended up with an extra half-pint jar of mincemeat that I did not process in the water bath.  I will let this jar sit in the fridge to mellow for a week or two and then I'll try it in a small batch of mince tarts.  Watch for an upcoming post on that!